-
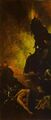 Hell, by Hieronymus Bosch, c. 1500
 -
 A Violent Forcing of the Frog, Hieronymus Bosch, c. 1500


Zone Writer:
Directions:
- s*s*d*e*e*w*e (from Ki-Rin lair in Arachnos)
Zone Reset Timer:
- 60 minutes (empty)
Story/History
- Rumors tell of a dark portal beneath a great spider out of the forests of Haon-Dor that leads to the plane known as Hell. They also speak of great devils, mighty creatures who rule the plane, and objects of great wealth and power here.
- Unfortunately, these rumors cannot be confirmed, as any who dare to enter this place never return...
Mobs of Note:
- Asmodeus (Shroud of Patience , Ebon Helm with Twisted Horns, Staff of Sleep), Orcus (Mallet of Orcus ), TIAMAT (butterfly knife ), Fallen Angel, Jezourobu, Ichthyoacouatl, nymph, Hell Guardian
General Zone Strategy:
- To get into Hell, you'll have to pass the Great Door, and the Empress of Arachnos at the base of the Web in Arachnos.
- Summon in a picking thief to unlock the Great Door and optionally defeat the Empress (she doesn't block). Descend into the pit until you come to the River Styx.
- Be landed! If you are flying, his trigger will not initiate and you will stand beside him, bobbing on the Styx for all eternity Blow the conch to summon Charon and his raft. The next command must be "pay charon" to cross over. Beware the hidden nymphs along the path as they remove all PC buffs.
- Kill the Hell Guardian (he entropies) and all north (including the long path through the Leap of Faith) to the Base of the Sisyphus Hill. True TIAMAT is north.
- Mirror your B30, and debuff TIAMAT. Use naked M30s to mage debuff TIAMAT. Ignore the other dragon heads. Use a low ac W30 to take down TIAMAT. It tosses and PROCS, so plan accordingly. Sisyphus lurks in the room, so beware area spells to take the heads as Sisyphus tosses.
- This zone resets occupied, so get out of there when done!
- Up to the Sand Dunes, then continue north to the Moebius Strip. North to the Rift and on to the Second Triangle where you'll find the first of Asmodeus' lieutenants: Orcus.
- Each successive lieutenant has about 2500 HP and some nifty secondary PROCs, like THOR! and FACQULAR! and toss. Make your way n to Asmodeus. Sometimes you can get a toss north from a mob! They are not aggressive, so gatewalk away!
- Asmodeus is evil aggro! but can be affected by pfe and perma pfe equipment (like the Ephod of the High Priest ). Asmo has memory, but is calmable, so plan accordingly. Asmo will area, so keep your summoning healer one south for re-glows and heals.
Equipment:
- A plaque affixed to the wall of Asmodeus' Chamber describes the Blindsight Quest :
Mahatma thanks you for surviving here and taking the time to read this.

You notice in small writing beneath, the following text:

Once thou hast collected all the parts of this, the most dark blade
of all, place them together with the curse of the dark, and release
thy vengeance upon the world, with the most foul blade of all,

                Blindsight, the Demonblade!!
|
ITEM |
TYPE |
MOB |
LOAD % |
DISPLAY |
|---|---|---|---|---|
| ebon helm adorned with the twisting horns of a demon | head | Asmodeus | 15.0% | mL 21 !mctpjrb 20 ac 1 dam 10% mvR |
| infamous staff of sleep | wand | Asmodeus | 50.0% | mL 0 !rests 5 x sleep |
| Shroud of Patience | about | Asmodeus | mL 0 !rests 8 ac 1 wis 6% mnR | |
| the blue longsword | weapon | Asmodeus | 25.0% | mL 15 !mc e 4D5 12.0 avg 2 str 20% hpR |
| Blindsight the Demonblade | weapon | assembly | mL 15 !mct e! 5D5 15.0 avg 3 dam 12% mnR | |
| Staff of Omens | wand | green dragon head | 50.0% | mL 0 !twnrb 3 dam 3 x dispel good |
| the blue longsword | weapon | Hell Guardian | 35.0% | mL 15 !mc e 4D5 12.0 avg 2 str 20% hpR |
| hell stone | wand | Jezourobu TIAMAT |
mL 0 !rests 1 x curse | |
| Mallet of Orcus | weapon | Orcus | 35.0% | mL 15 !twpnj e! 5D5 15.0 avg 2 dam 3 wis |
| pebble | wand | TIAMAT | mL 15 !rests 1 x earthquake | |
| the butterfly knife | weapon | TIAMAT | 5.0% | mL 20 tns! n! 6D5 18.0 avg 3 dex 20 hp |
Maps:
